How To Remove Makeup From A Leather Car Interior

January 14, 2024
Jane Smith, Managing Director
How To Remove Makeup From A Leather Car Interior
Understanding Makeup
Removing makeup from a leather car interior requires a gentle approach to avoid damaging the leather. You can’t use steam on leather as this causes damage to the coating and layers of how the leather skin is made up.
In almost all cases makeup is waterproof, so this creates issues with cleaning as you can’t just spray a cleaner on and wipe over with a cloth.
Make up can be a stubborn item to remove, but with the correct approach this can be removed without causing damage to the leather surface.
Never allow oil-based makeup to linger around on leather as it just attracts more dirt and grime, and this will create more issues with damage to the surface coating.
With makeup being made from oil (usually mineral oil) or emollient (such as petrolatum, beeswax, or lanolin) which is used as the main ingredient, then a pigment will be added. With these type of products, they form a base that hard to break down and bet through on leather as the more you rub over them the more you can polish the makeup in particular where beeswaxes have been used. But oil-based products particularly stubborn to remove.
Don’t use APC on any leather, some all-purpose cleaners contain the foaming agents triethanolamine (TEA) and diethanolamine (DEA), which react with nitrites (an often-undisclosed contaminant or preservative) and form nitrosamine – a carcinogen that easily penetrate the skin.
What You Need
On standard pigmented leather which is the average type of leather in cars today, you will need a leather cleaner and a brucle brush, bamboo fibre towels and a Tampico leather cleaning brush.
The First Step
First step is to vacuum the leather to be cleaned to remove any dust or sand particles that cause scratching when cleaning, once fully vacuumed, the next step is to mask up any electrics like window switches or dashboards switches on the leather interior.
Always use a professional leather cleaner for the job.
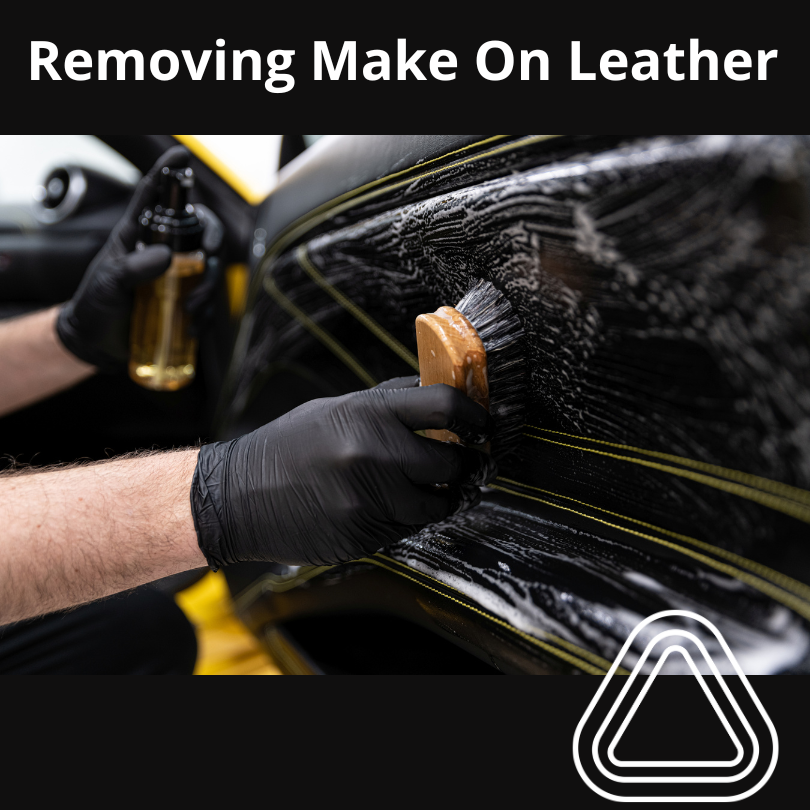
The Cleaning Process
When you begin the cleaning process, you have to be careful not to smudge this around even further, by using a dry cloth approach.
Spray directly onto the item to be cleaned, then using the brucle brush gently rub this over the surface to slowly break down the build-up of makeup and foundation, removing makeup is never an easy task and requires several attempts to clean.
If the makeup is very stubborn and after multiple tries you can add 5% alcohol cleaner to the leather cleaning solution and spray this onto the surface to be cleaned and once again gently using the Tampico brush rub over the surface to break down the makeup and wipe away with a bamboo fibre towel.
Applying Protection
Once you have removed all the makeup from the interior you will proceed by applying some protection, makeup normally bonds to the surface due to the lack of protection, for the best protection possible, you are better off applying a leather protection spray followed up by leather protection cream or leather guard®.
With leather protection never overload the surface with the coating being applied, always make sure the surface is full dried before applying, then apply in a circular motion to the surface avoid lines and swirls.
You only need to apply a single coating of each if you are doing a layered finish, that means applying leather protection spray and then leather protection cream and leather guard. If you are just applying either of these as a stand-alone protection products then two coats is all that is required, allow to fully dry between coats.
Either of these products can be applied using a red LRC application pad, take a look at this video about protection.
Why Not Contact Us?
Call on: 01482 606864
Email us at: help@leatherrepaircompany.com